Hello friends, In this post you will see an example that helps you to show toast message through screen flow. This is very useful, when you have to display any confirmation/error message to user while performing action through screen flow. so let's get started,
Show toast in lighnting screen flow
Use Case : Suppose we have to create contact record related to account through screen flow.
To implement this functionality, we have to create two things, these are:
1. Lightning Web Component (LWC)
2. Screen Flow
First we started with lightning web component.
ToastInFlow.js
 import { LightningElement, api } from 'lwc';
 import { ShowToastEvent } from 'lightning/platformShowToastEvent';
 export default class ToastInFlow extends LightningElement {
    @api mode;
    @api variant;
    @api message;

    connectedCallback() {
        this.showToast();
    }

    showToast() {
        const toastEvt = new ShowToastEvent({
            title:"LWC Toast",
            mode: this.mode,
            variant: this.variant,
            message: this.message
        });
        this.dispatchEvent(toastEvt);
    }
 }
ToastInFlow.js-meta.xml<?xml version="1.0"?>
<LightningComponentBundle xmlns="http://soap.sforce.com/2006/04/metadata">
<apiVersion>51.0</apiVersion>
<isExposed>true</isExposed>
<targets>
<target>lightning__FlowScreen</target>
</targets>
<targetConfigs>
<targetConfig targets="lightning__FlowScreen">
<property name="mode" type="String" label="Enter Mode" default="dismissible"/>
<property name="variant" type="String" label="Enter Varient"/>
<property name="message" type="String" label="Enter Toast Message"/>
</targetConfig>
</targetConfigs>
</LightningComponentBundle>
Now we have to create a screen flow. so let's see the steps, how to include component inside screen flow.
Step 1: Add a screen component in to your flow and configure like below image.
Step 2: Create a text variable named "ContactId".
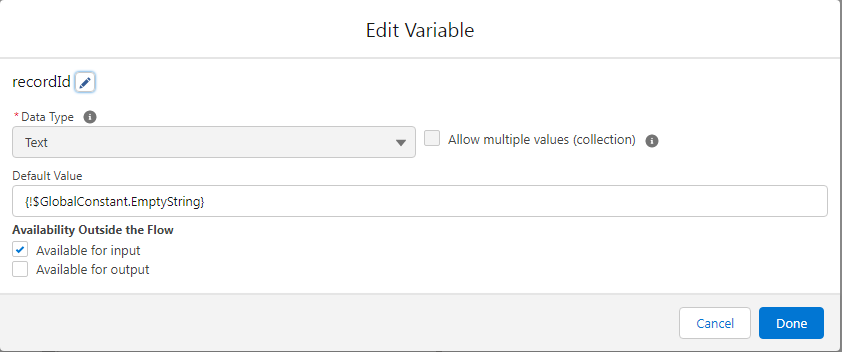
Step 3: Create another text variable named "recordId" .
Step 4: Add a "Create Record" element inside your screen flow with following fields mapping.
Step 5: Add another screen element in your flow in which you have to include lwc that we created above.
Step 6: Add another screen element for fault in your flow in which you have to include lwc that we created above.
Final structure of your screen flow should be look like below image. If yes, then hit the save button and active the flow.
Step 7: Open any account record detail page and edit it, Inside lighting app builder drag a flow component into the record detail page after that select your screen flow and marked check "Pass record ID into this variable". See below the image.
Step 8: Save your account record detail page. Page will look like below image.
Output:
Hope you like this post, for any feedback or suggestions please feel free to comment. I would appreciate your feedback and suggestions.
Thank you.


0 Comments
Post a Comment